FeatAPI 的第三发认证授权是基于 OAuth2.0 实现的。获取用户token,并且以有用户身份获取用户资源的流程,如下图所示。
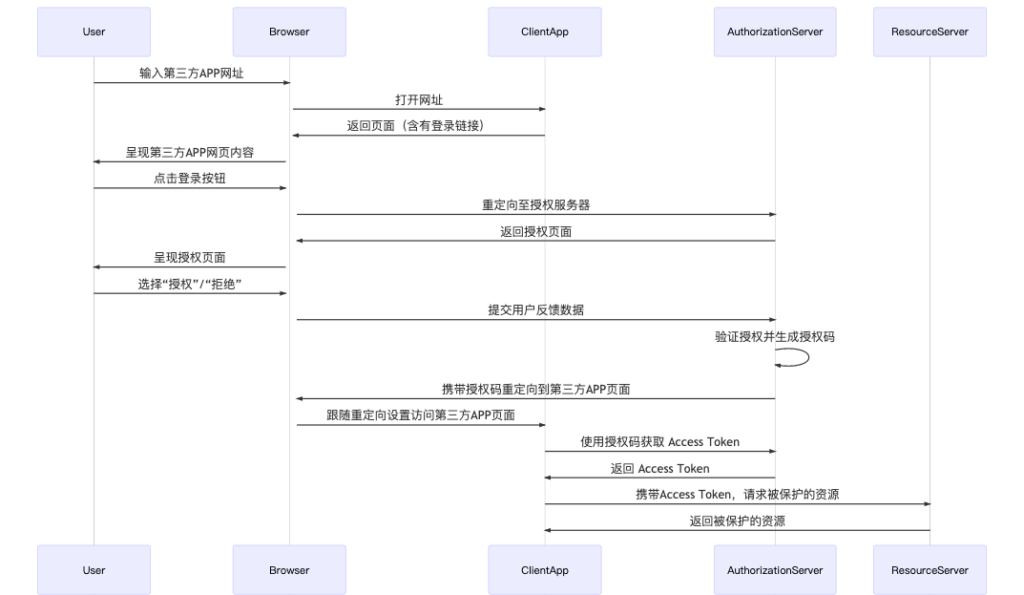
关于 OAuth2.0 的技术知识,可查阅:
创建应用
要想开始使用 featapi.com 提供的 API。首先,您需要有一个 feat.com 账号。注册账号可前往:https://www.feat.com
在 feat.com 上完整注册并登录后,可访问“应用管理”页面 https://www.feat.com/application。在这个页面下,您可以创建、修改、删除 feat.com 上的 OAuth 应用
点击左上角的按钮“创建应用”,展开创建应用表单。填入应用名称、选择授权类型以及`Redirect URI`,如下图所示:
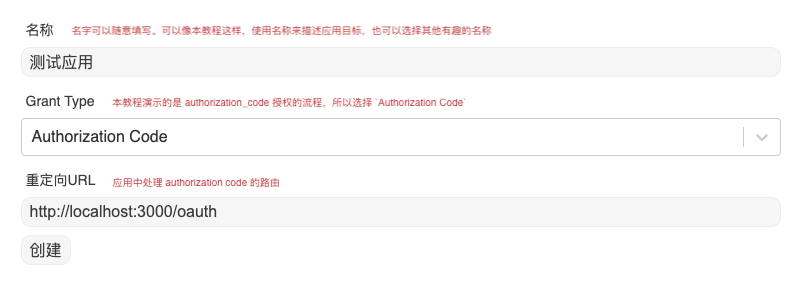
完成表单后,提交。系统会创建为您创建一个应用,并在“应用管理”显示应用信息。
使用示例
下面是使用 express 创建一个简单的网页应用。来演示如何一步一步地获取 featapi.com 上的授权,并且以用户身份调用API。 示例代码已上传到GitHub:OAuth Example
新建目录, 初始化一个 nodejs 项目
# 新建项目文件夹 并 进入
# 初始 npm 项目
mkdir feat_oauth_example && cd feat_oauth_example && npm init -y
package.json 参考:
{
  "name": "feat_oauth_example",
  "version": "1.0.0",
  "description": "",
  "main": "index.js",
  "scripts": {
    "test": "echo \"Error: no test specified\" && exit 1"
  },
  "keywords": [],
  "author": "",
  "license": "ISC"
}
安装依赖包
npm i express dotenv node-fetch ejs -S- Express: Fast, unopinionated, minimalist web framework for Node.js
- dotenv: loads environment variables from a .env file into process.env
- ejs: Embedded JavaScript templates
- node-fetch: A light-weight module that brings Fetch API to Node.js.
开始创建应用
1、新建入口文件 index.js,创建一个简单的 express 应用
require('dotenv').config()
const express = require('express')
const path = require('path')
const app = express()
const port = process.env.PORT || 3000

// handle request body
app.use(express.json())
app.use(express.urlencoded({ extended: false }))

// setup view engine
app.set('views', path.join(__dirname, 'views'))
app.set('view engine', 'ejs')

app.get('/', (req, res) => {
  res.send('Hello world')
})

app.listen(port, () =>
  console.log(`Example app listening at http://localhost:${port}`)
)
2、编辑 package.json 在 scripts 中添加启动命令
{
    // ...
    "scripts": {
        // ...
         "start": "node index.js"
         // ...
    }
    //...
}3、在终端中执行启动命令npm start,终端中会显示 Example app listening at http://localhost:3000,然后使用浏览器访问项目url,效果如下图

组装授权链接
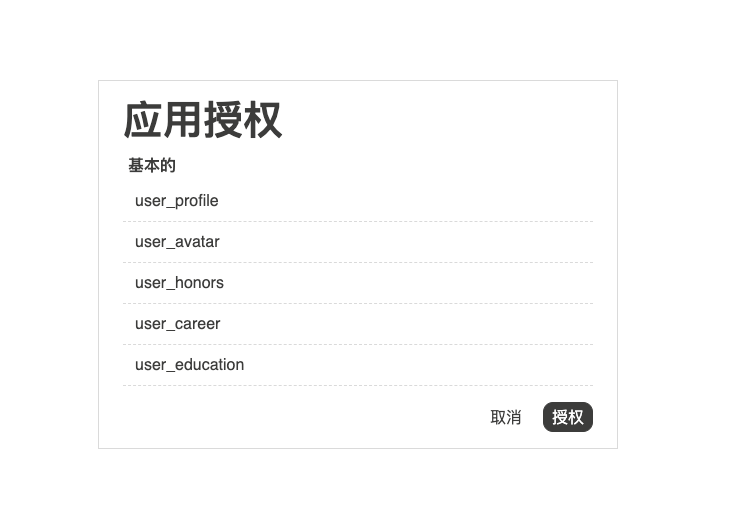
我们要想在应用中使用用户身份来调用API,那我们需要获取代表用户身份的令牌。因为用户是feat.com上的用户,所以我们需要把用户带到feat.com上的应用授权页面。feat.com 的授权页面上会展示,我们的应用信息,以及应用请求的权限列表。用户需要根据自行判断,决定是否授权。当用户决定授权后,feat.com 返回一个带着“授权码”的重定向地址,使浏览器访问到我们的“重定向”地址(应用内的响应地址),然后我们的应用会拿着这个“授权码”,访问featapi.com来换取用户身份的令牌。
与一般OAuth2.0认证类似,feat.com 需要开发者按照以下格式组装认证地址:
https://www.feat.com/authorize?client_id={clientId}&redirect_uri={redirectUri}&response_type=code&scopes={scopesInfo}
为了方便开发配置,我们将变量写入到 .env 文件中。在项目根目录中新建文件 .env,并编辑
FEAT_AUTHORIZE_ENDPOINT=https://www.feat.com/authorize
FEAT_CLIENT_ID=
FEAT_CLIENT_SECRET=
在 index.js 中添加函数
const qs = require('querystring')
const getAuthorizeLink = () => {
  return `${process.env.FEAT_AUTHORIZE_ENDPOINT}?${qs.stringify({
    client_id: process.env.FEAT_CLIENT_ID,
    response_type: 'code',
    redirect_uri: 'http://localhost:3000/oauth', // 同创建应用时设置的 redirect_uri
    scopes: 'all'
  })}`
}
修改路由
app.get('/', (req, res) => {
  return res.render('index', {
      login_url: getAuthorizeLink()
  })
});
在 views 目录下,添加 index.ejs 模版文件,渲染登录链接
<a href='<%= login_url %>'>login</a>重新启动服务,访问 http://localhost:3000,效果如下图:
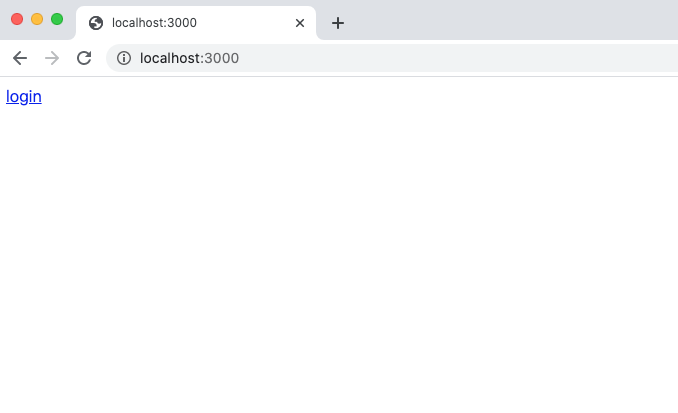
点击链接,用户可以访问到 feat.com 的授权页面,页面大致如下图:
处理“授权码”
当用户点击上图中的“授权”后,页面会重新回到到我们的应用网站。此时,浏览器上应该会出现错误提示 Cannot GET /oauth,因为我们还没有编写对应的路由。
接下来,我们开始编写这个/oauth 路由的功能。在/oauth 这个路由上面,我们需要实现的是使用feat.com的给出的“授权码”换取用户token。所以我们在/oauth 的控制代码里面,需要向 featapi.com 发起一个换取认证token的请求
请求信息大致如下:
POST /api/o/token

body {
  client_id: string,
  client_secret: string,
  grant_type: 'authorization_code',
  code: <authorization_code>,
  redirect_uri: 'http://localhost:3000/oauth'
}编辑index.js,添加/oauth 路由
const fetch = require('node-fetch');
const apiFetch = (endpoint, options) => {
  return fetch(`${process.env.FEAT_API_ENDPOINT}${endpoint}`, options).then(
    res => res.json()
  )
}

app.get('/oauth', async (req, res) => {
    try {
        const body = {
            grant_type: 'authorization_code',
            client_id: process.env.FEAT_CLIENT_ID,
            client_secret: process.env.FEAT_CLIENT_SECRET,
            code: req.query.code,
            redirect_uri: 'http://localhost:3000/oauth'
        }
        const tokenInfo = await apiFetch(`/api/o/token/`, {
            method: 'POST',
            body: qs.stringify(body),
            headers: {
            'Content-Type': 'application/x-www-form-urlencoded'
            }
        })
        // TODO: 将token存起来
        return res.json(tokenInfo);
    } catch (err) {
        return res.send(err.message).status(500);
    }
})重新启动项目,并访问http://localhost:3000, 点击 login,进入到feat.com 的授权页面。完成授权后,浏览器上应该会出现token的信息,参考页面见下图:

生产环境中 token 这类信息不应直接暴露出来,此处只是为了演示,临时展示出来。
将token存储起来,并使用token请求用户数据
上一部分,我们已经成功获取到代表用户身份的token。接下来,我们会将token信息存储起来,这样我们在后续的API请求中就可以使用这个token来代表用户获取资源信息了。教程中只是简单的演示一下将token信息保存起来的动作,所以直接设置了一个 token 全局变量来存储token信息。实际项目中,一般使用 cookie-session 或者数据库进行存储。现在我们开始对路由进行修改。
打开index.js,修改 /oauth 路由
let token;

app.get('/oauth', async (req, res) => {
    try {
        const body = {
            grant_type: 'authorization_code',
            client_id: process.env.FEAT_CLIENT_ID,
            client_secret: process.env.FEAT_CLIENT_SECRET,
            code: req.query.code,
            redirect_uri: 'http://localhost:3000/oauth'
        }
        const tokenInfo = await apiFetch(`/api/o/token/`, {
            method: 'POST',
            body: qs.stringify(body),
            headers: {
            'Content-Type': 'application/x-www-form-urlencoded'
            }
        })
        // 将tokenInfo存起来,并且转跳到首页。
        token = tokenInfo;
        return res.redirect('/');
    } catch (err) {
        return res.send(err.message).status(500);
    }
})
修改 / 路径对应的路由
app.get('/', async (req, res) => {
    // 当存在token信息时,获取用户基本信息,并展示出来
    if (token) {
        try {
            const { data } = await apiFetch('/api/user/basic-info/', {
            headers: {
                Authorization: `Bearer ${token.access_token}`  // 在请求中带上用户token
            }
            })
            res.render('user-info', {
                userInfo: data,
            })
        } catch (err) {
            res.send(err.message).status(500);
        }
        return
    }
    return res.render('index', {
      login_url: getAuthorizeLink()
    })
})
添加用户信息展示模板, 在views目录中新建文件user-info.ejs,并编辑
<!DOCTYPE html>
<html lang="en">
<head>
    <meta charset="UTF-8">
    <meta name="viewport" content="width=device-width, initial-scale=1.0">
    <title>Document</title>
    <link rel="stylesheet" href="https://maxcdn.bootstrapcdn.com/bootstrap/4.0.0/css/bootstrap.min.css" integrity="sha384-Gn5384xqQ1aoWXA+058RXPxPg6fy4IWvTNh0E263XmFcJlSAwiGgFAW/dAiS6JXm" crossorigin="anonymous">
</head>
<body>
    <div>
        <div class="card" style="width: 18rem;">


        <div class="card-body">
            <div>
                <img src="<%= userInfo.avatar %>" style="width: 64px; height: 64px;" class="rounded-circle">
            </div>
            <h5 class="card-title"><%= userInfo.username %></h5>
            <p class="card-text">
                <%= userInfo.expertise %>
            </p>
            <a href="/profile" class="btn btn-primary">Detail</a>
        </div>
        </div>

    </div>
    <script src="https://code.jquery.com/jquery-3.2.1.slim.min.js" integrity="sha384-KJ3o2DKtIkvYIK3UENzmM7KCkRr/rE9/Qpg6aAZGJwFDMVNA/GpGFF93hXpG5KkN" crossorigin="anonymous"></script>
    <script src="https://cdnjs.cloudflare.com/ajax/libs/popper.js/1.12.9/umd/popper.min.js" integrity="sha384-ApNbgh9B+Y1QKtv3Rn7W3mgPxhU9K/ScQsAP7hUibX39j7fakFPskvXusvfa0b4Q" crossorigin="anonymous"></script>
    <script src="https://maxcdn.bootstrapcdn.com/bootstrap/4.0.0/js/bootstrap.min.js" integrity="sha384-JZR6Spejh4U02d8jOt6vLEHfe/JQGiRRSQQxSfFWpi1MquVdAyjUar5+76PVCmYl" crossorigin="anonymous"></script>
</body>
</html>
重新启动项目,并访问 http://localhost:3000 ,点击“Login”,完成授权后,页面上显示的效果下图:
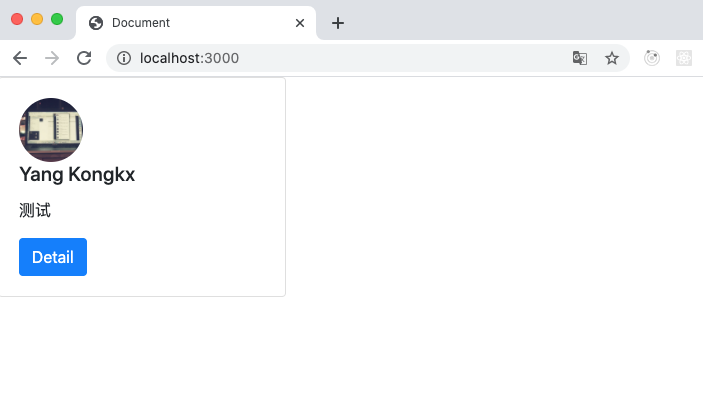
来到这里,整个演示调用演示就已经完成了。
提示
Redirect URI 中填入的地址应该与您的应用中处理“feat.com authorize重定向”的路由相连